Introduction
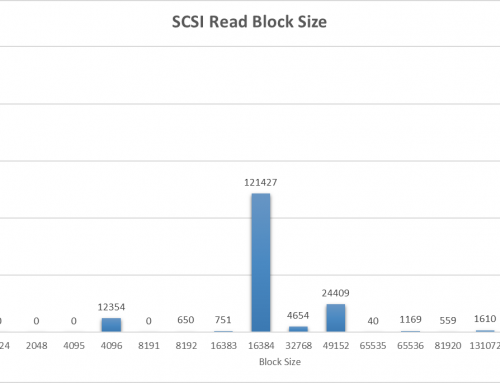
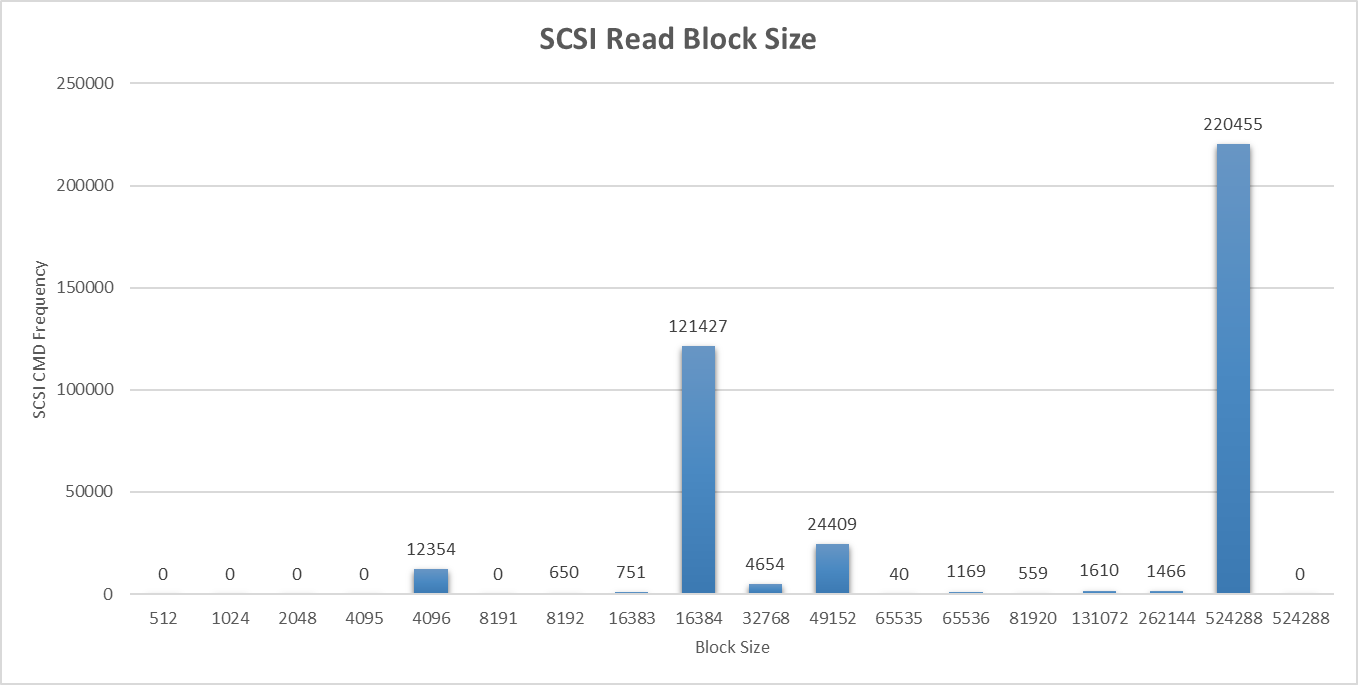
In the last part of this series we walked through determining if a workload is appropriate for vSphere Flash Read Cache. We then looked at the different aspects of sizing the cache appropriately for a workload. We determined the correct size via table hit statistics queried from the Oracle Database. We determined the correct block size by using the vscsiStats ESX command to gather statistics on the size of I/O commands on a specific VMDK. In our example the database is 1.1TB, and we require a 150GB cache with a 512KB block size.
In this part we will cover the following:
- Presenting a number of SSDs to the hypervisor in a RAID0 configuration
- Configure the ESX host to treat the newly found drive as an SSD
- Make the SSD available as a Virtual Flash Resource
- Configure our Data Warehouse’s data drive to have the configuration we reasoned out in Part 1.
Provisioning the SSDs
For our solution we are using two Dell PowerEdge M710HD blade servers with two Dell 200GB SAS SSDs each.
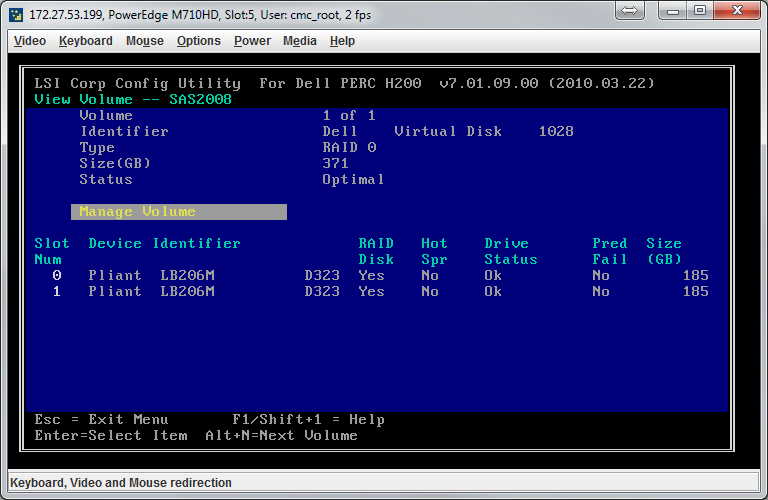
After inserting them into the blade we then needed to create a new RAID set combining the drives together into a RAID0 stripe. In the case of vFRC RAID0 is a very attractive option because fault tolerance is not necessary (if the cache randomly disappears all I/O goes straight to the back-end storage device) and it gives increased performance over a single larger SSD.
The steps for creating a RAID set vary by controller manufacturer and individual steps are outside of this article. If you have a single SSD, depending on the disk controller you may be able to pass through the SSD straight to the hypervisor. If you have more than one SSD or a disk controller that doesn’t support passthrough, you will need to create a RAID0 stripe of all disks.
An example setup for a Dell PERC controller with two 200GB disks is below:
Reboot the host into ESX (ensure your boot order is still properly defined).
Mark Disk as SSD
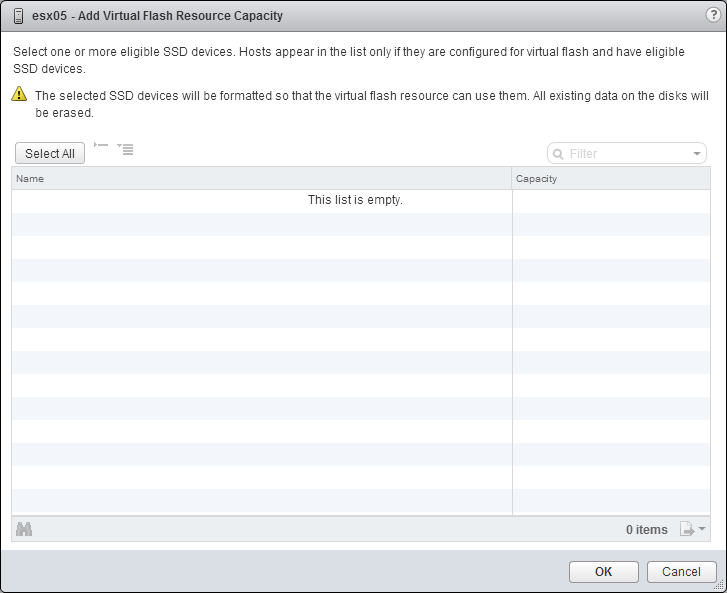
Now the expected result would be to be able to add this RAID0 SSD set as a Virtual Flash Resource. Wrong! If you have a single SSD with passthrough you can skip this step. Almost any RAID controller set up to RAID SSDs will display as a non-SSD, therefore making it “non-flash” and unable to be added as a Virtual Flash Resource.
You can verify this by selecting a host in the vSphere Web Client, going to the Manage tab, then to Settings, and then to Virtual Flash Resource Management and choosing “Add Capacity…” at the top.
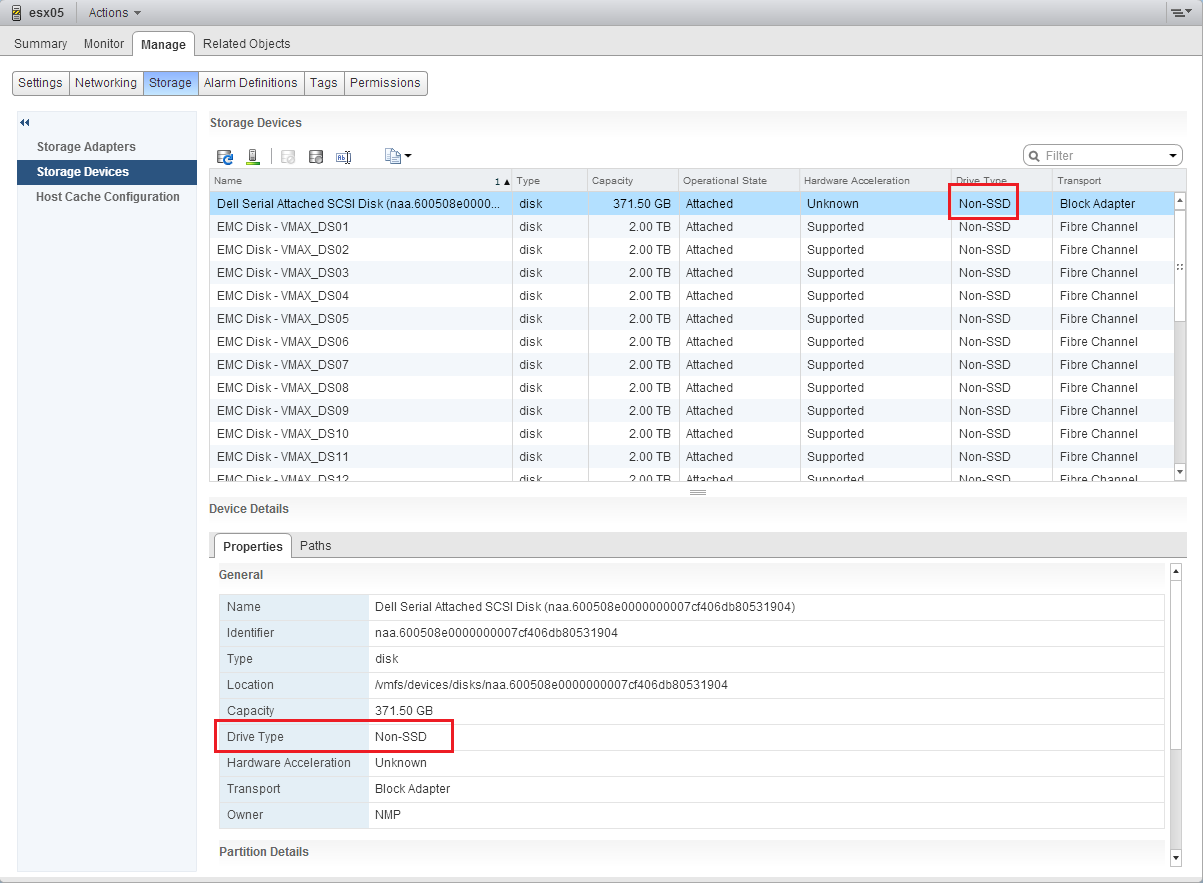
In order for a device to be displayed in this list it MUST be recognized as an SSD by the ESX host. To verify the host views the drive as a non-SSD in the vSphere Web Client, with a host selected, go to Manage, then Storage, then Storage Devices.
Below you can see the drive marked as a non-SSD:
Unfortunately there is no easy right-click solution for marking as an SSD. The solution requires us to set the SSD flags via the ESX command line. Open up a command line to your ESX host. Run the following command:
[... SNIP ...]
naa.600508e0000000007cf406db80531904
   Device Display Name: Dell Serial Attached SCSI Disk (naa.600508e0000000007cf406db80531904)
   Storage Array Type: VMW_SATP_LOCAL
   Storage Array Type Device Config: SATP VMW_SATP_LOCAL does not support device configuration.
   Path Selection Policy: VMW_PSP_FIXED
   Path Selection Policy Device Config: {preferred=vmhba2:C1:T0:L0;current=vmhba2:C1:T0:L0}
   Path Selection Policy Device Custom Config:
   Working Paths: vmhba2:C1:T0:L0
   Is Local SAS Device: true
   Is Boot USB Device: false
[... SNIP ...]
Find your disk in the long list that will be displayed. I suggest copy and pasting the output for that specific disk into a notepad so you don’t get it confused with a LUN. That would be bad.
You can display extended details about the disk as follows:
naa.600508e0000000007cf406db80531904
   Display Name: Dell Serial Attached SCSI Disk (naa.600508e0000000007cf406db80531904)
   Has Settable Display Name: true
   Size: 380416
   Device Type: Direct-Access
   Multipath Plugin: NMP
   Devfs Path: /vmfs/devices/disks/naa.600508e0000000007cf406db80531904
   Vendor: Dell
   Model: Virtual Disk
   Revision: 1028
   SCSI Level: 6
   Is Pseudo: false
   Status: degraded
   Is RDM Capable: true
   Is Local: false
   Is Removable: false
   Is SSD: false
   Is Offline: false
   Is Perennially Reserved: false
   Queue Full Sample Size: 0
   Queue Full Threshold: 0
   Thin Provisioning Status: unknown
   Attached Filters:
   VAAI Status: unknown
   Other UIDs: vml.0200000000600508e0000000007cf406db80531904566972747561
   Is Local SAS Device: false
   Is Boot USB Device: false
   No of outstanding IOs with competing worlds: 32
To mark the disk as SSD run the following command. Be sure and take care to replace the items in brackets.
esxcli storage nmp satp rule add --satp=[Storage Array Type] --device=[SCSI NAA] --option="enable_ssd enable_local"
You can find the Storage Array Type from the first “device list” command. In my example the command would be:
esxcli storage nmp satp rule add --satp=VMW_SATP_LOCAL --device=naa.600508e0000000007cf406db80531904 --option="enable_ssd enable_local"
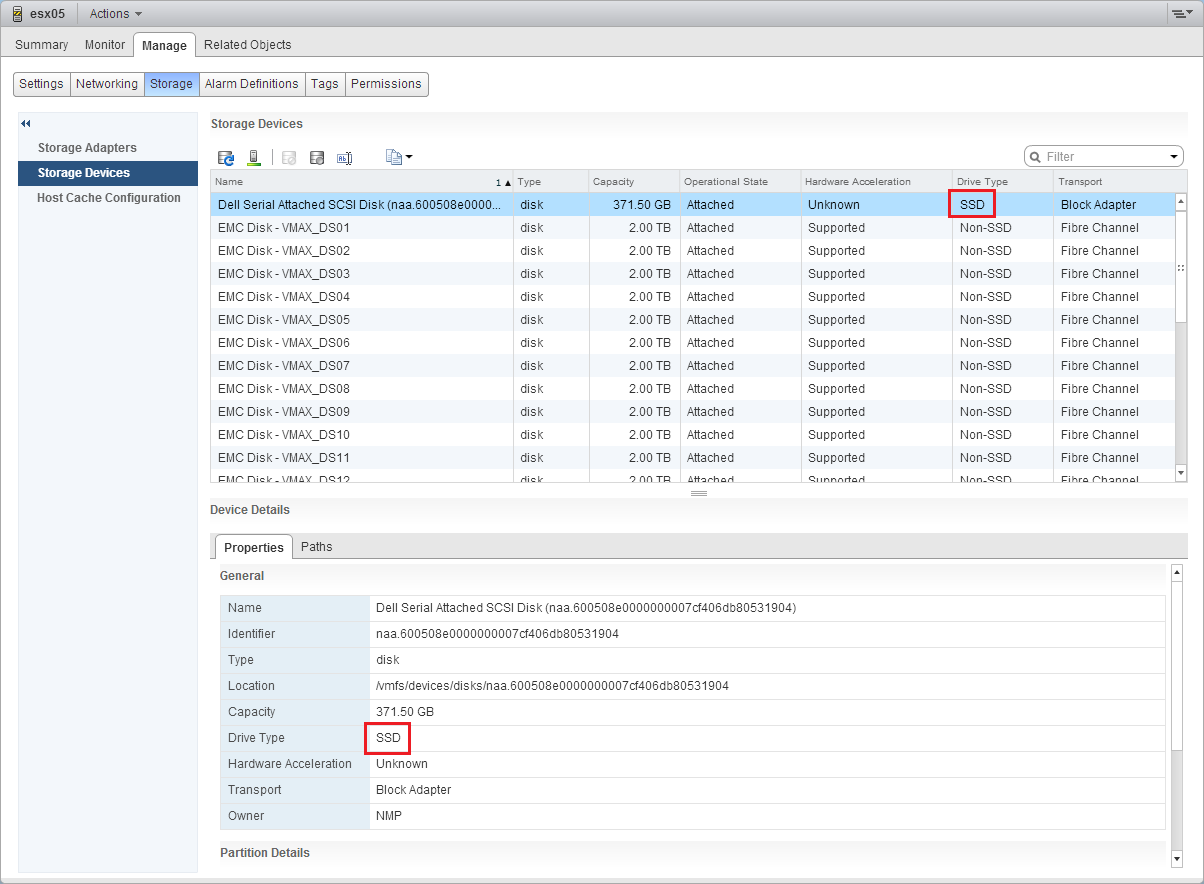
You will need to reboot the ESX host for the disk to be recognized as an SSD. After the host reboots you can double check the drive type again:
Provision the Flash Read Cache
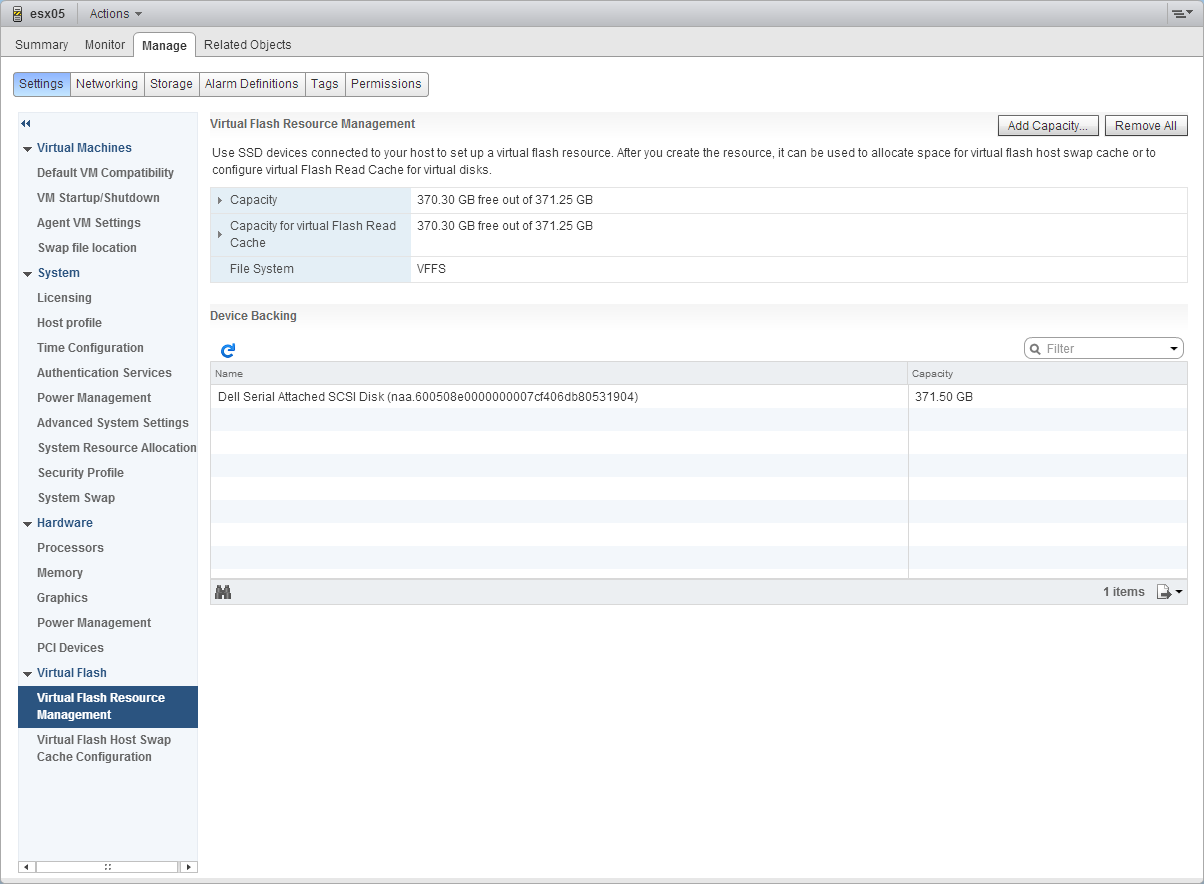
After your disk is marked as an SSD it should be available in the “Add Capacity…” window under Virtual Flash Resource Management under Settings.
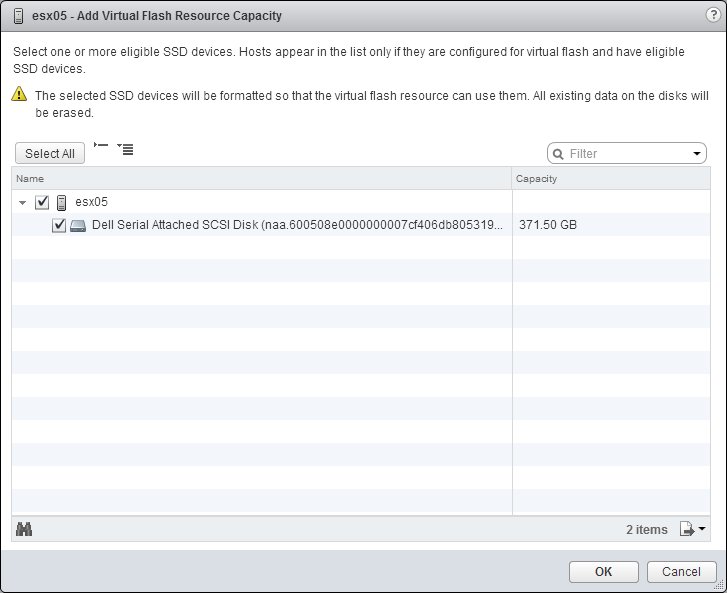
Check the boxes and click “OK”. The new space should then show up as additional capacity under Virtual Flash Resource Management:
Now that we have successfully provisioned the disks as a Flash Resource on a single host, it is time to redo the above steps on this page for all other hosts that the guest will reside on.
NOW IS THE TIME TO PROVISION YOUR OTHER HOSTS USING THE STEPS ON THIS PAGE.
Once all the hosts have been provisioned you can enable the vFRC on a VMDK. Browse to a VM and Edit Settings. The VM can be running. Expand the VMDK you analyzed in Part 1 and click Advanced in the Virtual Flash Read Cache row. Enter the information determined in Part 1. My example is below:
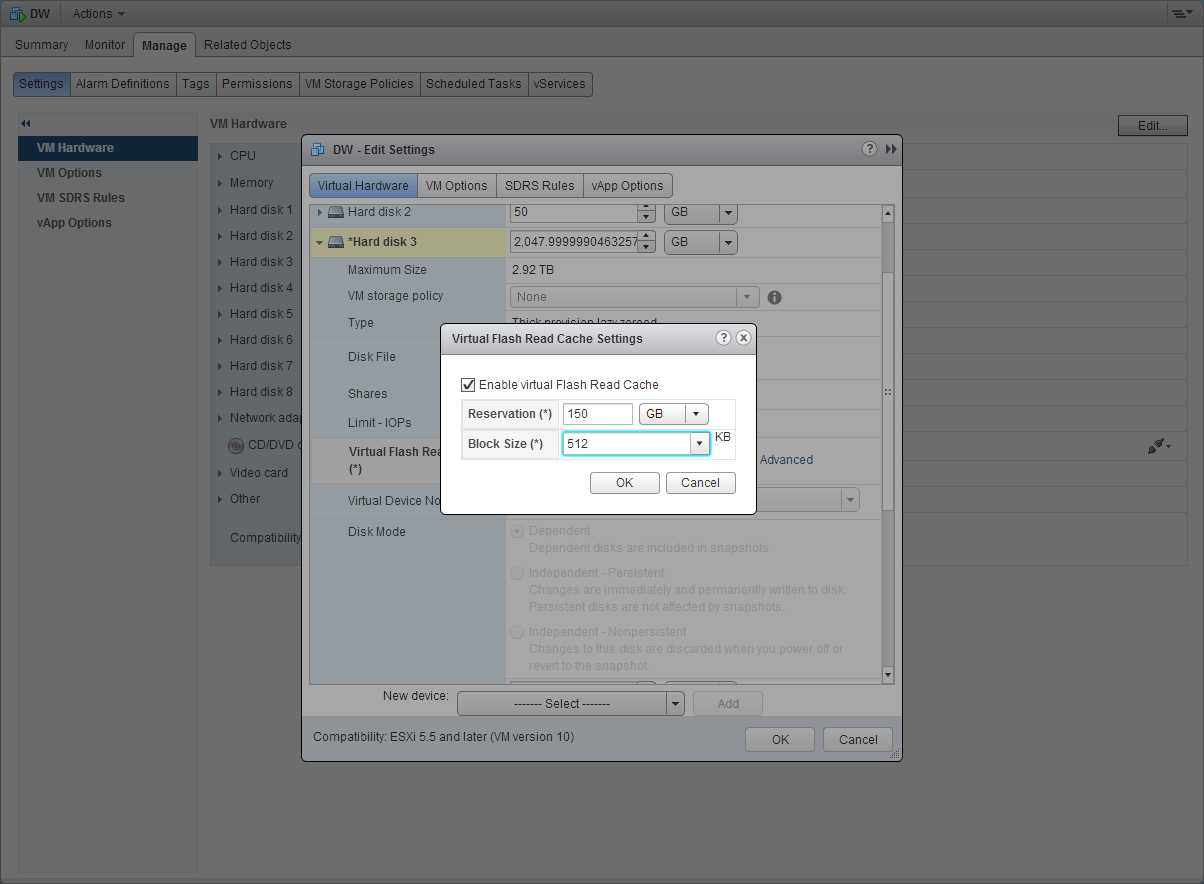
OK your way out of the settings and verify the vFRC is now displayed under VM Hardware:

Once you can see it assigned to the VM you’re done… for now. The next phase is monitoring and tweaking.
Conclusion
In this part we’ve accomplished the following:
- Summarized our findings from Part 1, where we determined a 150GB vFRC cache size with a 512KB block size.
- Install and provision the SSDs to the ESX host via the disk/RAID controller.
- Change disk flags via the ESX command line to view the new RAID set as a SSD.
- Provision a new Virtual Flash Resource from the newly recognized SSD.
- Assign vFRC resources to a VM using the initial settings found in Part 1.
Additional Reading:
- Tag Devices as SSD – vSphere 5.5 Documentation Center
- Enabling the SSD option on SSD based disks/LUNs that are not detected as SSD by default
- Configure Flash Read Cache for a Virtual Machine – vSphere 5.5 Documentation Center
In Part 3 we’ll cover the following:
- Monitor the performance changes on the Data Warehouse Database.
- Tweak the vFRC settings as needed while providing reasoning behind the change.
Hi Caesar,
I was wondering how vFRC worked for your environment after setting it up.
Do you still use this technology? And if so, has ESXi been upgraded to version 6.0 already.
I also found this bug with vFRC in ESXi 5.5/6.0 that wasn’t resolved yet – https://kb.vmware.com/kb/2136867. And I appreciate your opinion about this one.
Great article, very helpful thanks